
You can use different methods to take a screenshot on a Windows computer or laptop. Windows has an in-built program to take screenshots which works fine but you can also use third party software to get some extra features.
In this article, I will show you how to take a screenshot with and without using software on Windows.
Table of Contents
ToggleTake a Screenshot without Software
Method 1
This will capture a screenshot of your entire screen and save it to the clipboard. You can then paste it into a document like word or inside an image editor like Photoshop to save it.
Method 2
You can also use a built-in tool called ‘Snipping tool’ to capture screenshot on a Windows PC. For this, press the “Windows key + Shift + S”. This will open the Snipping Tool, which allows you to select a specific area of your screen to capture.
Press and hold left click and drag your mouse to select a specific area on the screen

Take Screenshots using the Software
This method is my personal favorite and I always use it to take screenshots on my machine. You can download and install a very lightweight software called Lightshot that allows you to take screenshots on your Windows computer quickly and easily. It also works with Apple Mac machines.
Download and install Lightshot from the official website LINK
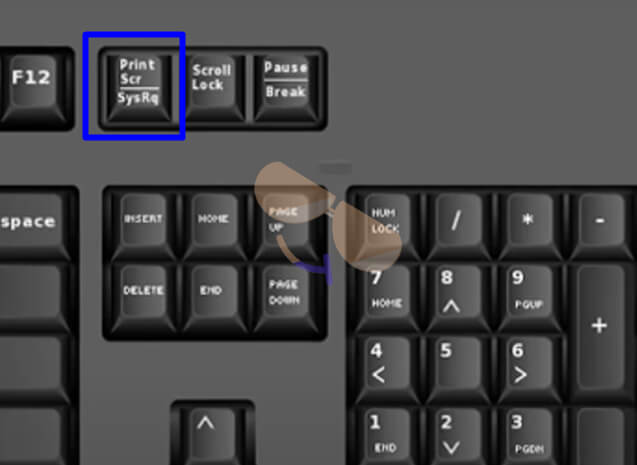
Once installed, launch Lightshot by clicking on the icon in your system tray or by pressing the “Print Screen” button on your keyboard.
Use your mouse to select the area of the screen that you want to capture. Until this part, the software did not provide anything extra when compared to Windows in-build tools.
But, when you are done selecting an area for the screenshot, you will see some icons around your screenshot as shown in the picture below.
These are very useful and I will explain some of them below.

The icons on the right side are for adding annotations to your screenshot.
You can select your color choice and draw a box around the photo, create a straight line, use a pencil tool to draw a free hand, use an arrow tool to point something in a screenshot, or use a Text tool to write detailed information.
The lightweight tool also shows you the width and height of the captured shot at the top, in case you need specific dimensions.
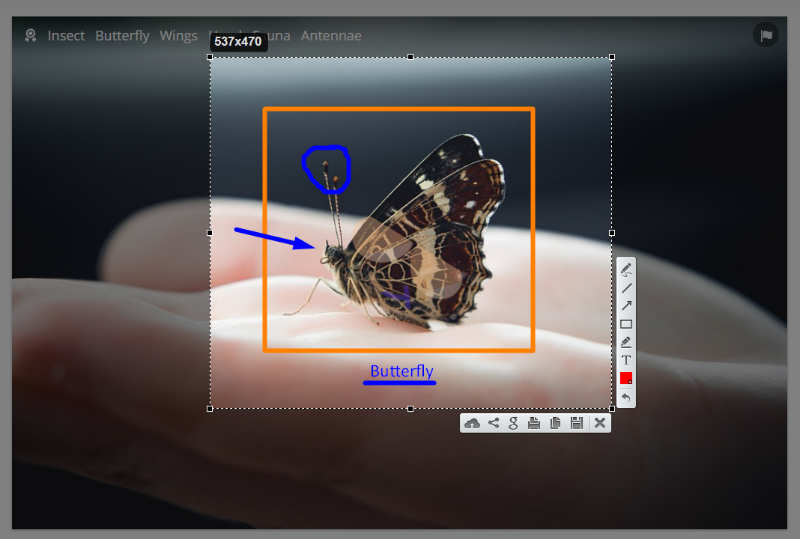
Once you are done editing the picture you can use the options given below the photo to save, copy, print, or share the screenshot.
Besides lightshot, you can find a number of software that can take screenshots on Windows or Mac. I am listing a few if you want to explore them.
PicPick
Greenshot
Snagit
I hope you liked this blog post, Enjoy taking screenshots